5 Best Ways to Install Built In Louver Glass for Privacy?

Time:2026-09-22 Author:Isabella
0%

Built-in louver glass can divide rooms, soften sunlight, and protect privacy without creating a heavy, closed-in feeling. Yet installation quality determines whether the system performs well. Poorly aligned louvers may leave visible gaps, collect dust, or weaken the seal around the frame. This guide examines five practical methods for installing built-in louver glass, with attention to privacy, ventilation, safety, and long-term maintenance.

How to install built-in louver glass for maximum privacy? The answer depends on louver direction, glass position, frame depth, and viewing angles. Horizontal blades can block direct sightlines when tilted downward, while frosted or textured glass can improve privacy when louvers remain open. The U.S. Department of Energy reports that windows can account for about 25–30% of residential heating and cooling energy use, so sealing and glazing choices matter beyond appearance. Small gaps matter.

Industry guidance from the National Fenestration Rating Council also shows why measured U-factor and solar heat gain performance should guide product selection. However, privacy ratings are not always standardized across louver systems. That limitation deserves attention. A professional installer should verify the opening, confirm the hardware load, and test the blades before final sealing. The 2024 Houzz & Home Study also indicates that homeowners continue investing in renovation projects, but attractive results should not replace technical planning. Expect practical details here, including measuring the jamb, selecting opaque or low-visibility glass, securing the frame, and checking privacy from standing and seated positions. Real rooms vary. Your lighting will too.
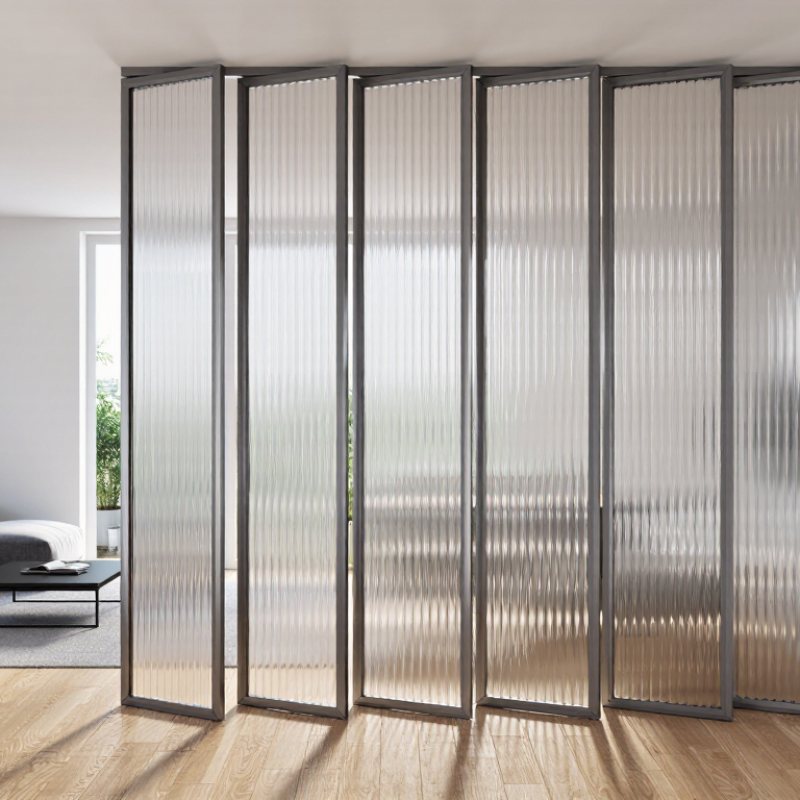
5 Best Ways to Install Built In Louver Glass for Privacy?

Assess the Opening and Select Louver Glass for Your Privacy Needs

Before ordering built-in louver glass, measure the opening at three points: top, center, and bottom. Record width, height, depth, and diagonal differences. A square opening is rarely perfect. Even a 5-millimeter variation can create uneven gaps or difficult adjustments during installation.

Check the frame for moisture damage, loose masonry, and an unreliable sill. Louver glass needs a stable, level base. Decide where privacy matters most: eye level, the full opening, or only a narrow sightline. Fixed louvers can block direct views, while adjustable blades offer ventilation but may reveal more from certain angles. The U.S. Department of Energy reports that windows can represent 25% to 30% of residential heating and cooling energy use, so glass selection affects comfort as well as privacy. Review NFRC-rated U-factor and solar heat gain coefficient values when available. Frosted or textured glass may improve privacy, but it can reduce daylight more than expected. Test a sample beside the actual opening. Small details matter.

Avoid guessing the blade angle. Morning and evening views change. A thoughtful assessment should include neighboring windows, interior lighting, and the user’s standing height. One overlooked issue is cleaning access. Dust collects around louver edges. The choice may not be perfect, but measured evidence is safer than appearance alone. A qualified installer should verify tolerances before final fabrication.

Install Louver Glass Within an Existing Window or Door Frame

Installing built-in louver glass inside an existing window or door frame requires careful measurement, not guesswork. Measure the opening at three heights and widths, then use the smallest dimension. Check the frame depth, square, sill condition, and available clearance for the operating mechanism. A few millimeters can decide whether the louvers open smoothly or scrape the frame.

Remove the existing sash or glass carefully, while preserving the frame’s drainage paths. Fit setting blocks beneath the louver assembly, keep the unit level, and leave the manufacturer’s recommended expansion gap. Apply compatible glazing tape or sealant around the perimeter, but do not block weep holes. The U.S. Department of Energy reports that windows can cause 25–30% of residential heating and cooling energy use. Poor sealing may therefore reduce comfort and increase energy loss.

Angle the louvers toward the viewing direction, then test privacy from standing and seated positions. NFRC guidance also reminds installers that performance ratings apply to the complete fenestration assembly, not only the glass. An existing frame may have weak hinges, hidden corrosion, or inadequate structural support. That part is easy to overlook. Recheck the lock, wind movement, water drainage, and air leakage after installation. Sometimes, replacing the frame is safer than forcing a retrofit.

Fit a Recessed Louver Panel into a Wall or Room Divider

A recessed louver panel can bring privacy, airflow, and softer daylight to a wall or room divider. The opening must be planned before cutting the wall. Measure the panel, frame, and trim twice. Leave a few millimetres for adjustment. A small error becomes obvious.

Build a rigid inner frame from straight, moisture-resistant material. Anchor it to studs or a reinforced divider, not only to plasterboard. Add a level sill to prevent the panel from twisting. Set the louvers toward the least visible angle, then check privacy from standing and seated positions. Seal narrow gaps with suitable trim, but avoid blocking the louver movement. These five choices matter: accurate measuring, strong framing, secure anchoring, careful louver alignment, and clean finishing.

For a bathroom-adjacent wall, use corrosion-resistant fasteners and protect exposed edges from moisture. In a bedroom divider, a darker louver angle can reduce silhouettes without making the space feel closed. Test the panel during different daylight conditions. Evening lighting may reveal shapes that daytime testing misses. I once underestimated the effect of a nearby lamp, and the panel offered less privacy than expected. That mistake suggests a practical check: stand outside the room, move the light source, and inspect the view through every gap. A removable trim piece also helps future maintenance, although it may look less seamless.

5 Best Ways to Install Built-In Louver Glass for Privacy

Comparative planning scores for common louver-glass applications. Higher scores indicate stronger performance for each design goal.

Scores use a practical 1–5 scale: privacy reflects visual screening, ventilation reflects airflow potential, daylight reflects light transmission, and installation simplicity reflects the amount of framing and site work typically required.

Mount Louver Glass in a Custom-Built Privacy Screen

Mount Louver Glass in a Custom-Built Privacy Screen

A custom-built privacy screen gives louver glass a stronger architectural role. Measure the opening after framing, not before. Leave a small installation gap for movement and drainage. Set each panel on firm, nonporous setting blocks. Never drill or cut tempered glass on site. The opening should remain square within the frame manufacturer’s tolerance. It sounds minor. It prevents cracked corners.

Angle the louvers toward the sightline you need to block. A 30- to 45-degree position often balances privacy, daylight, and airflow, but the angle needs testing at eye level. Add a sloped sill and discreet weep paths so rainwater can escape. Use compatible gaskets or sealants around the glass. Avoid trapping moisture behind the frame.

The U.S. Department of Energy reports that windows can account for 25% to 30% of residential heating and cooling energy use, so a ventilated louver screen may reduce reliance on artificial lighting and mechanical cooling when designed carefully.

NFRC guidance shows that frame, glass, and installation influence measured window performance, not glass alone. That matters here. A beautiful screen can still leak air around its edges. I once underestimated afternoon glare in a similar layout. A cardboard mock-up would have exposed it earlier. Test privacy from standing, seated, and diagonal viewing positions. Leave access for cleaning, because dust gathers quickly on angled surfaces.

Seal, Secure, and Test the Completed Installation

A built-in louver glass installation is not finished when the panels sit evenly in the frame. The seal must resist drafts, rain, and movement. I check the frame edges with clean, dry hands before applying sealant. Dust or moisture can create weak channels beneath the bead. Use a compatible sealant, and follow its curing time carefully. Rushing this stage causes trouble later.

Apply a continuous bead around the outer frame, especially at the lower corners. Do not block designed drainage paths. Smooth the bead with a damp finishing tool, then inspect it from both sides.

Fasteners should hold the frame firmly without distorting it. Over-tightening can crack glass or prevent the louvers from turning smoothly. I once tightened one corner too much and had to reset the frame. That mistake was avoidable.

After curing, operate every louver through its full range. Check that the blades overlap correctly and provide the intended privacy angle. Stand inside and outside the room during daylight. Small sight gaps are easier to notice then. Test the handle several times, listening for rubbing or rattling. A gentle water spray around the frame can reveal leaks, but avoid high pressure. Wipe the glass clean and inspect the seal under direct light. If a section looks uneven, repair it before the surrounding seal hardens. Do not rely on appearance alone. A secure installation should stay quiet, dry, and easy to operate.

FAQS

When should the opening be measured for a custom privacy screen?

Measure after framing is complete. Leave a small gap for movement and drainage. Keep the opening square.

How should louver glass panels be supported?

Place each panel on firm, nonporous setting blocks. They prevent pressure points and cracked corners.

Can tempered louver glass be drilled or cut during installation?

No. Order the correct size before installation. Never drill or cut tempered glass on site.

What louver angle usually balances privacy, light, and airflow?

A 30- to 45-degree angle often works well. Test it at eye level first.

How can rainwater escape from the privacy screen?

Use a sloped sill and clear weep paths. Do not seal over designed drainage openings.

How can I check privacy before final sealing?

Use a cardboard mock-up if possible. Test standing, seated, and diagonal views in daylight.

What should be checked before applying sealant?

Keep the frame edges clean and dry. Dust or moisture can create weak sealing channels.

How should the completed installation be tested?

Operate every louver fully. Check rubbing, rattling, sight gaps, and smooth movement. Use gentle water spray to find leaks.

What mistakes can damage the frame or glass?

Over-tightened fasteners may distort the frame or crack glass. I once tightened one corner too much. It needed resetting.

How can the screen remain easy to maintain?

Leave cleaning access around the angled surfaces. Wipe the glass and inspect the seal under direct light. Small defects matter.

Conclusion

How to install built-in louver glass for maximum privacy? Start by carefully assessing the opening, measuring its height, width, and depth, and choosing louver glass that balances airflow, light control, and visual privacy. Consider the angle, spacing, and opacity of the louvers based on whether the installation is intended for a bathroom, bedroom, office, or shared living area. Proper planning helps prevent gaps and ensures the glass complements the surrounding structure.

Built-in louver glass can be installed within an existing window or door frame, fitted into a recessed wall or room divider, or mounted in a custom-built privacy screen. Each option requires accurate alignment, stable support, and suitable framing materials. Once the panel is positioned, secure it evenly, apply appropriate sealant around the edges, and check that the louvers open, close, and adjust smoothly. Finish by testing for unwanted sightlines, drafts, movement, and rattling so the completed installation delivers dependable privacy, ventilation, and long-term performance.

Isabella

Isabella

Isabella is a dedicated marketing professional with a sharp focus on driving brand growth and engagement through strategic content creation. With an extensive background in digital marketing, she combines her passion for storytelling with her keen understanding of industry trends to deliver......